
使用HBuilderX搭建uni-app
 admin
admin温馨提示:文章已超过655天没有更新,若内容或图片失效,请留言反馈!
 摘要:
uni-app 是一个使用 Vue.js 开发所有前端应用的框架,开发者编写一套代码,可发布到iOS、Android、Web(响应式)、以及各种小程序(微信/支付宝/百度/头条/Q...
摘要:
uni-app 是一个使用 Vue.js 开发所有前端应用的框架,开发者编写一套代码,可发布到iOS、Android、Web(响应式)、以及各种小程序(微信/支付宝/百度/头条/Q... uni-app 是一个使用 Vue.js 开发所有前端应用的框架,开发者编写一套代码,可发布到iOS、Android、Web(响应式)、以及各种小程序(微信/支付宝/百度/头条/QQ/钉钉/淘宝)、快应用等多个平台。
查看更多
1、工具安装
HBuilderX:官方IDE下载地址
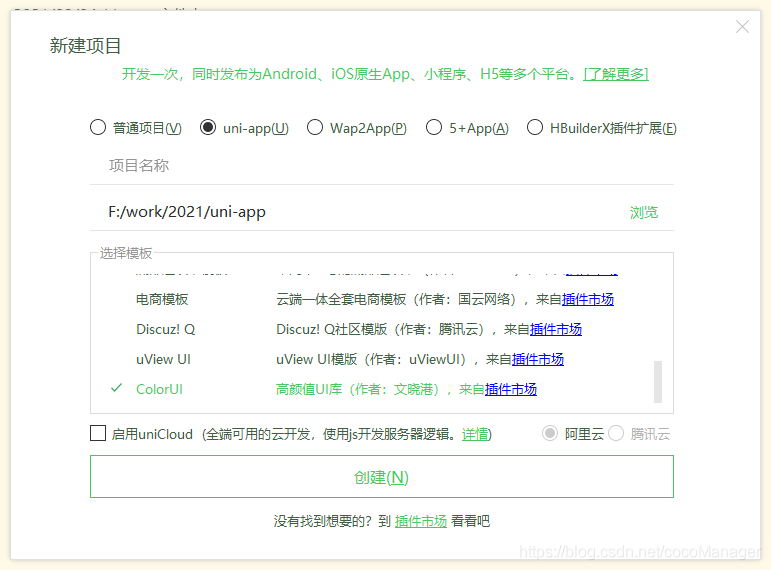
2、创建uni-app
创建项目:
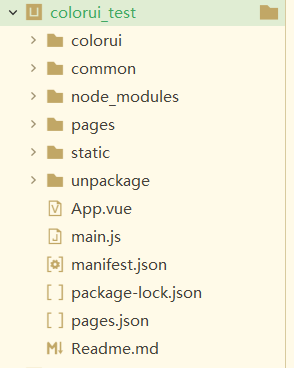
创建完后目录结构(common目录是手动创建的)
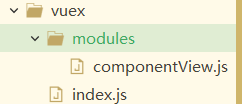
3、使用vuex
vuex是HBuilderX已经内置好了,可以直接使用
代码如下
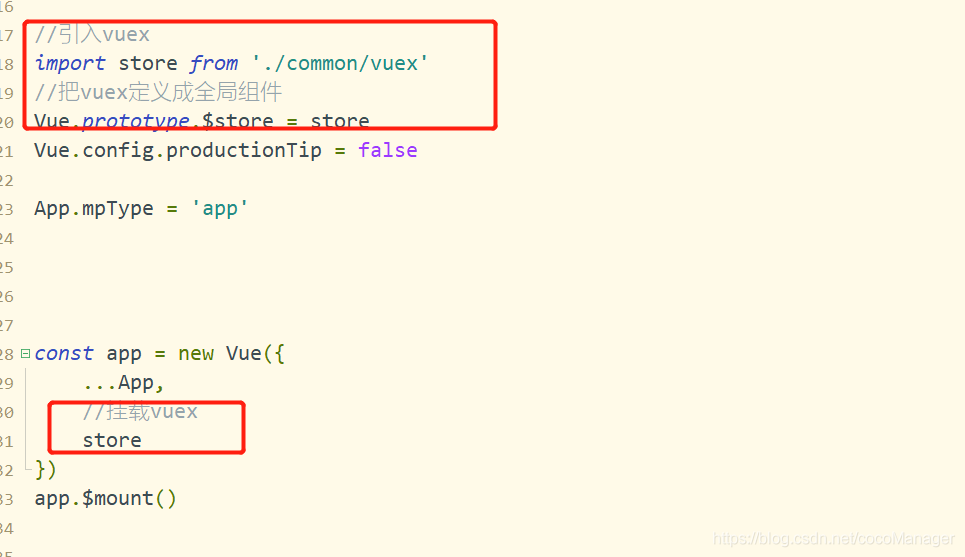
index.js
import Vue from 'vue'
import Vuex from 'vuex'

import componentView from './modules/componentView'


Vue.use(Vuex)
const store = new Vuex.Store({
  // 开启严格模式  确保state 中的数据只能 mutations 修改 不开启就可以随便修改
  //strict:true,
  state: {
  },
  mutations: {
    //
  },
  actions: {
    //
  },
  modules: {
    componentView
  }
})

export default store;
componentView.js
/**
 * 动态组件状态
 * @type {{state: {componentView: string}, mutations: {setRoleManageDetailState(*, *): void, setAuthoritySettingState(*, *): void}, getters: {getRoleManageDetail: (function(*): *)}, actions: {showRoleManageDetail({commit: *}, *=): void, showAuthoritySetting({commit: *}, *=): void}}}
 */
const componentView = {
  state: {
    componentView: Math.ceil(Math.random()*1000)
  },
  mutations: {
    setComponentViewState (state, flg) {
      state.componentView = flg
    }
  },
  getters: {
    getComponentViewState: state => {
      return state.componentView
    }
  },
  actions: {
    showComponentView ({ commit }, flg) {
      commit('setComponentViewState', flg)
    },
    showMathComponentView ({ commit }) {
let number = Math.ceil(Math.random()*1000);
console.log(number);
      commit('setComponentViewState', number)
    }
  }
}

export default componentView
修改main.js
4、测试
以上项目基本框架已经搭建好了。下面就是模拟运行了。
双击manifest.json配置,进行自定义配置即可。
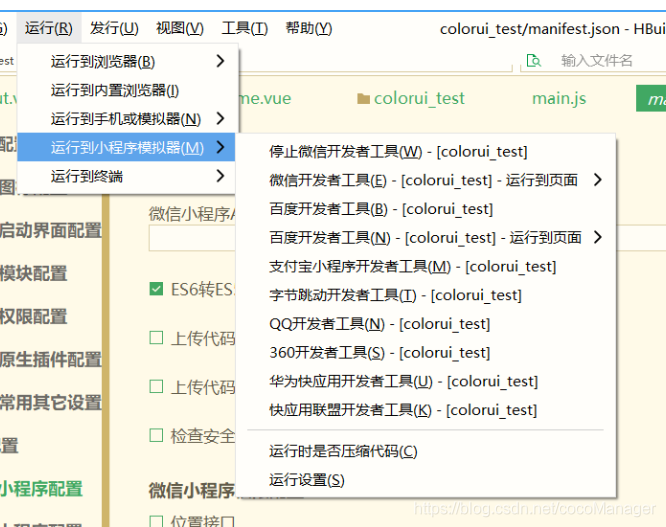
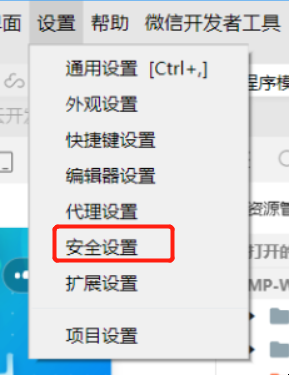
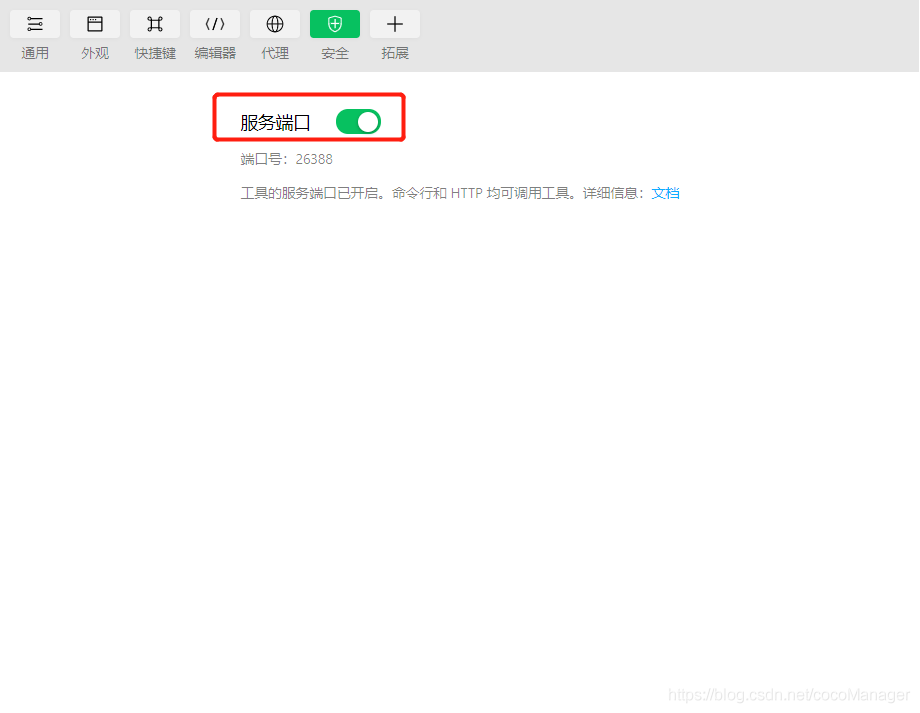
需要配置微信开发工具安全设置,如图
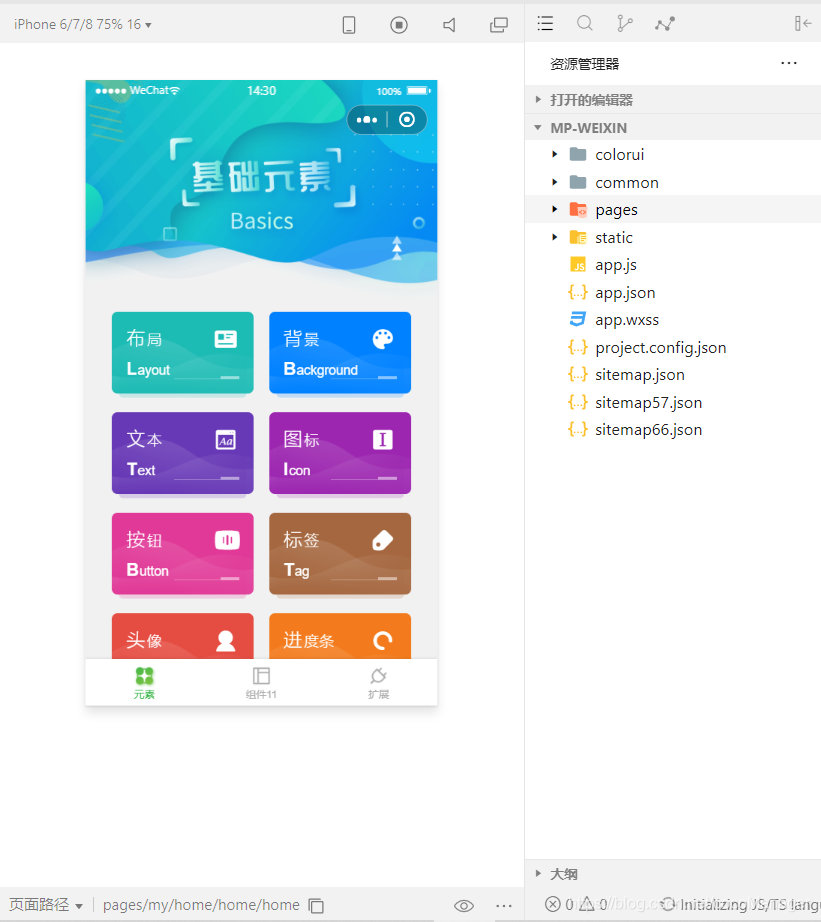
运行结果:
以上就是一个简单的uni-app搭建过程。
